认识Service Mesh(1): Deploy Istio on Kubernetes with GKE
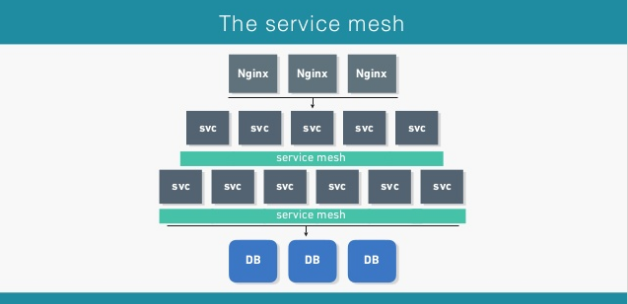
关注容器圈的朋友一定会注意到最近一年的高频词:Service Mesh。这么绕口的词,到底是什么意思?引用一篇文章里对其的解释:
A service mesh is a dedicated infrastructure layer for handling service-to-service communication. It’s responsible for the reliable delivery of requests through the complex topology of services that comprise a modern, cloud native application. In practice, the service mesh is typically implemented as an array of lightweight network proxies that are deployed alongside application code, without the application needing to be aware.
大致意译过来,就是:
- 是一种独立部署的基础设施
- 负责在云原生应用互相通信时,保证请求调用的可靠性。
- 一般是以对应用代码无侵入的方式部署,内部实现类似网络代理。
如果各位跟我一样,没有完全理解Service Mesh的概念和作用,那就动起来,Talk is cheap,show ne the demo.
目前整个社区,名气No #1的Service Mesh是来自Google的Istio,配合现在贵为容圈盟主的Kubernetes,计划做一次系列文章,通过实战,认识Service Mesh。
每次选择跑Demo环境,都是件头疼的事情。由于Kubernetes和Istio都是Google(大佬出手,天下我有)出品,所以在Google Cloud上跑demo应该会更配。Google Cloud官方文档上是有Istio的例子:
https://cloud.google.com/kubernetes-engine/docs/tutorials/istio-on-gke
来,开始搭建一个完整的Istio基础环境吧。
通过GKE创建自己的kubernetes集群
越来越多的国内外所谓的云平台厂商推出了基于kubernetes的容器云平台,并支持私有化部署。不妨先来看看,祖师爷Google是怎么做这口饭的。
在自己的终端上,推荐使用gcloud这个命令行工具进行一切与Google Cloud的交互操作,包括使用GKE创建kubernetes集群:
gcloud container clusters create istio-tutorial \
–machine-type=n1-standard-1 \
–num-nodes=4
等待创建完成,可以通过以下命令获取kubernetes集群的基本信息:
gcloud container clusters list

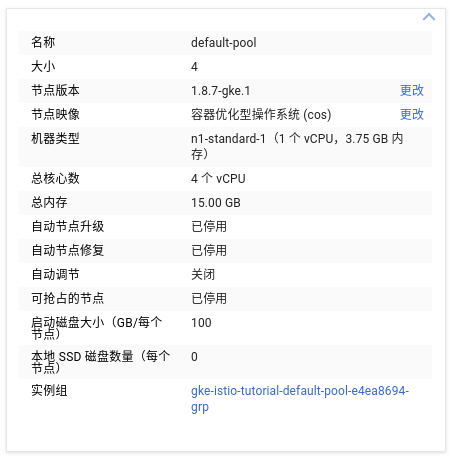
打开Google Cloud的Kubernetes Engine相关页面,也能看到集群的完整信息:
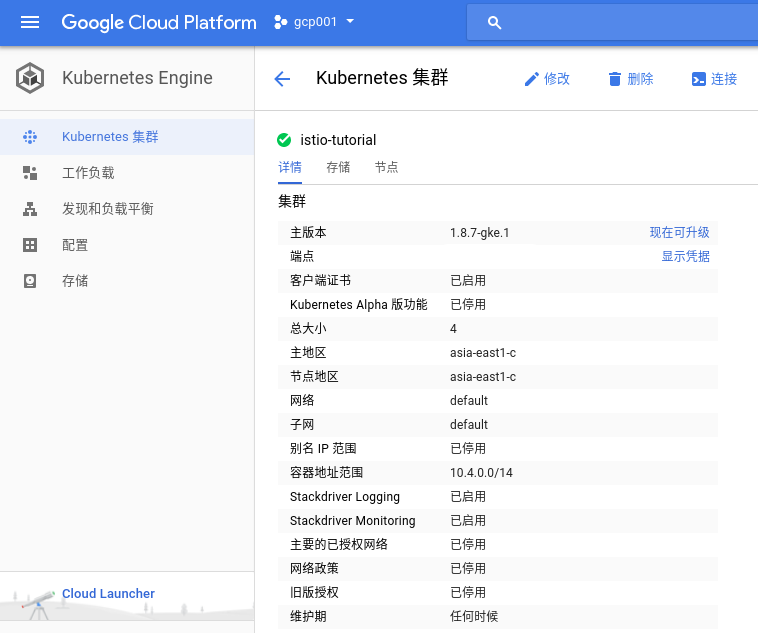
比较奇怪的是,GKE默认创建的kubernetes版本是1.8.7,而当前最新版本是1.9.3。看来连Google自己都跟不上kubernetes的快速发展了。
使用kubernetes部署Istio环境
所谓使用kubernetes(yaml描述文件)部署Istio,本质上是将所有Istio组件通过容器化部署,并使用kubernetes进行应用编排,从而快速搭建环境并提供完整服务。Istio官方社区已经提供了多种平台的部署方法,包括Google Cloud以及纯Kubernetes集群上。由于在纯Kubernetes部署更具普适性,所以选择它进行实验,本次Demo使用这个社区教程(https://istio.io/docs/setup/kubernetes/quick-start.html)进行Demo。
目前搭建Istio环境需要以下几个基础组件。每个组件的详细功能,这次先按下不表,待完全熟悉后进行逐个详解。
下载Istio最新稳定版release之后,一条简单的命令,就可以完成Istio部署:
kubectl apply -f install/kubernetes/istio-auth.yaml
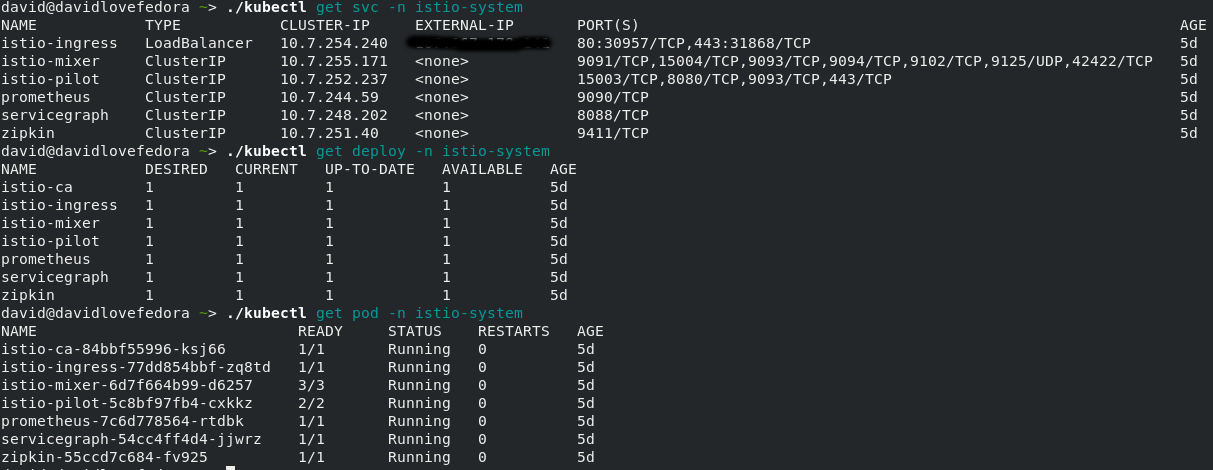
通过kubectl,即可查看Istio基础环境,包括service、deployment和pod:
- the example of istio system as an independent kubernetes namespace
通过Kubernetes部署bookinfo示例应用,配合Istio进行使用
网上以及社区好多文章中,都是使用Istio官方的一个经典示例应用,名叫bookinfo(samples/bookinfo) ,好比是当初docker刚刚推出时,经常用WordPress作为唯一示例一样。使用如下命令即可完成部署:
kubectl apply -f <(istioctl kube-inject -f samples/bookinfo/kube/bookinfo.yaml)
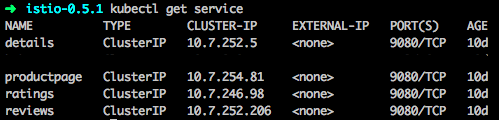
如果能看到以下4个service,说明bookinfo部署完成:
接下来,需要访问下这个bookinfo服务,确定下是否真的部署成功:
kubectl get ingress -o wide # 拿到集群的外网IP,并赋值给变量${GATEWAY_URL}
curl -I http://${GATEWAY_URL}/productpage
看到以下结果,说明服务已经成功部署了:
HTTP/1.1 200 OK
content-type: text/html; charset=utf-8
content-length: 4415
server: envoy
date: Tue, 06 Mar 2018 16:30:21 GMT
x-envoy-upstream-service-time: 113
Proxy-Connection: keep-alive
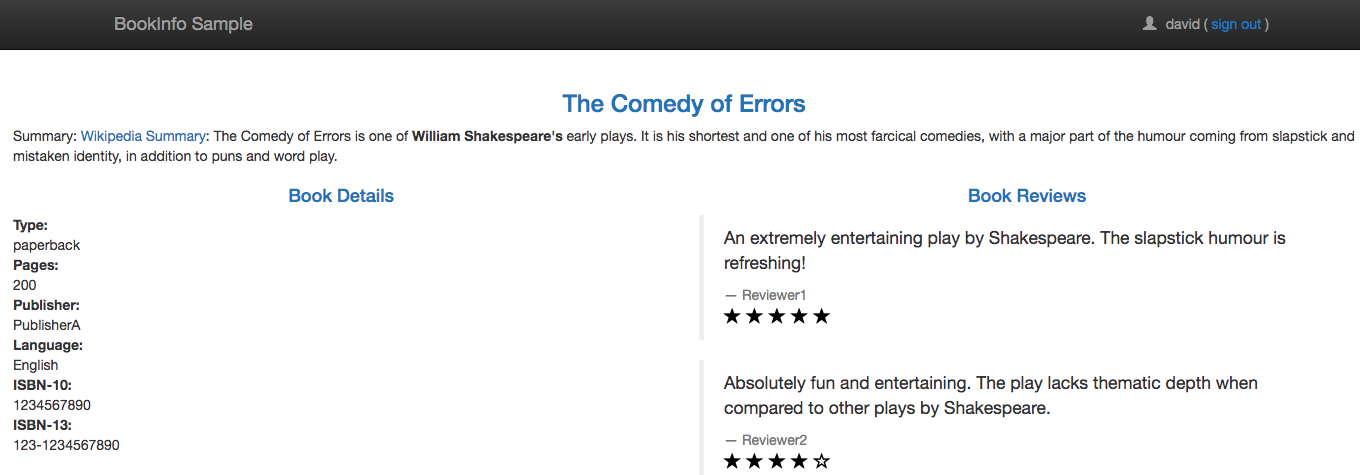
当然也可以在浏览器器访问这个productpage,效果如下:
其实特别想要一个spring cloud with Istio on k8s的例子。IBM好像尝试在做这件事情:https://github.com/IBM/spring-cloud-kubernetes-with-istio(PS:推荐一个来自IBM的kubernetes 教程)
好了,Istio环境搭建完毕,下篇文章,看看Istio到底能干啥。